FRC: Environment and Teams
Decide the Fiend environment first, then create teams. Basic / Premium users can freely build teams; Demo uses three fixed teams. Demo still allows environment adjustments, but team or character settings cannot be used to replace the fixed members.
1. Choose How to Start
Set Up the Environment Manually
Click "Environment Settings" on the main page, choose Normal mode or Guild Raid, then enter the parts, weak points, attribute, stats, and SP from the game data. Use this workflow to build everything manually when there is no official template.
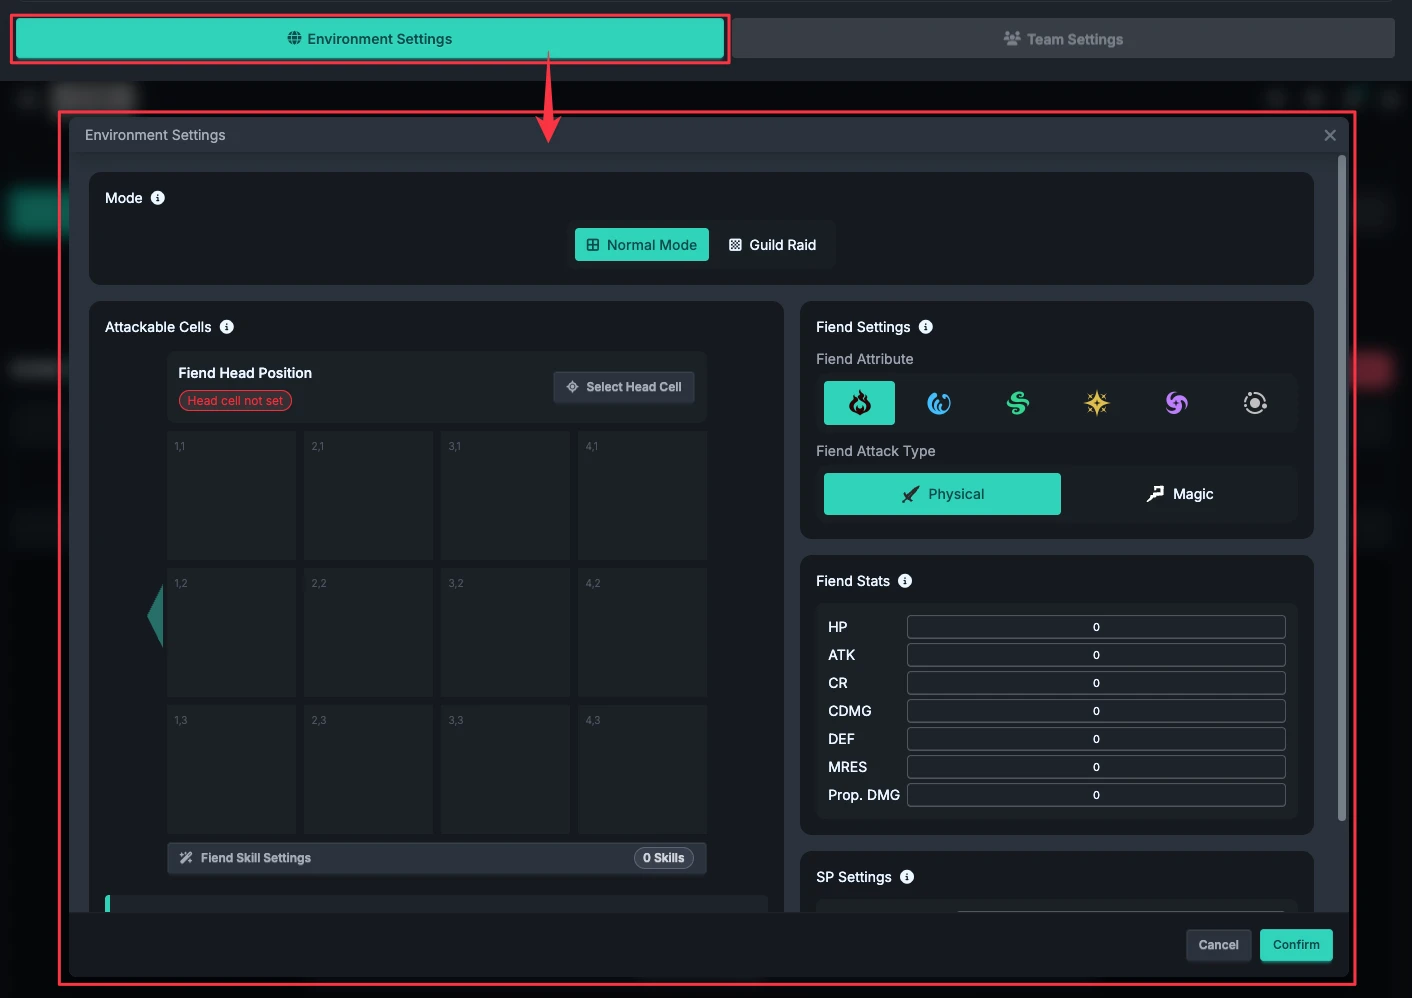
The regular environment fields, immunity options, and Fiend skill list edited here remain in the window until you click the outer "Confirm" button; clicking "Cancel" does not apply these pending changes. Changing modes asks you to confirm a reset. If you already have a timeline, save it first; changing modes is not merely changing the board's appearance.
Start with an Official Fiend Template
Official templates require Premium access. In Normal mode, open "Use Fiend Template" from "Environment Settings"; the Fiend skill list has an entry with the same name.
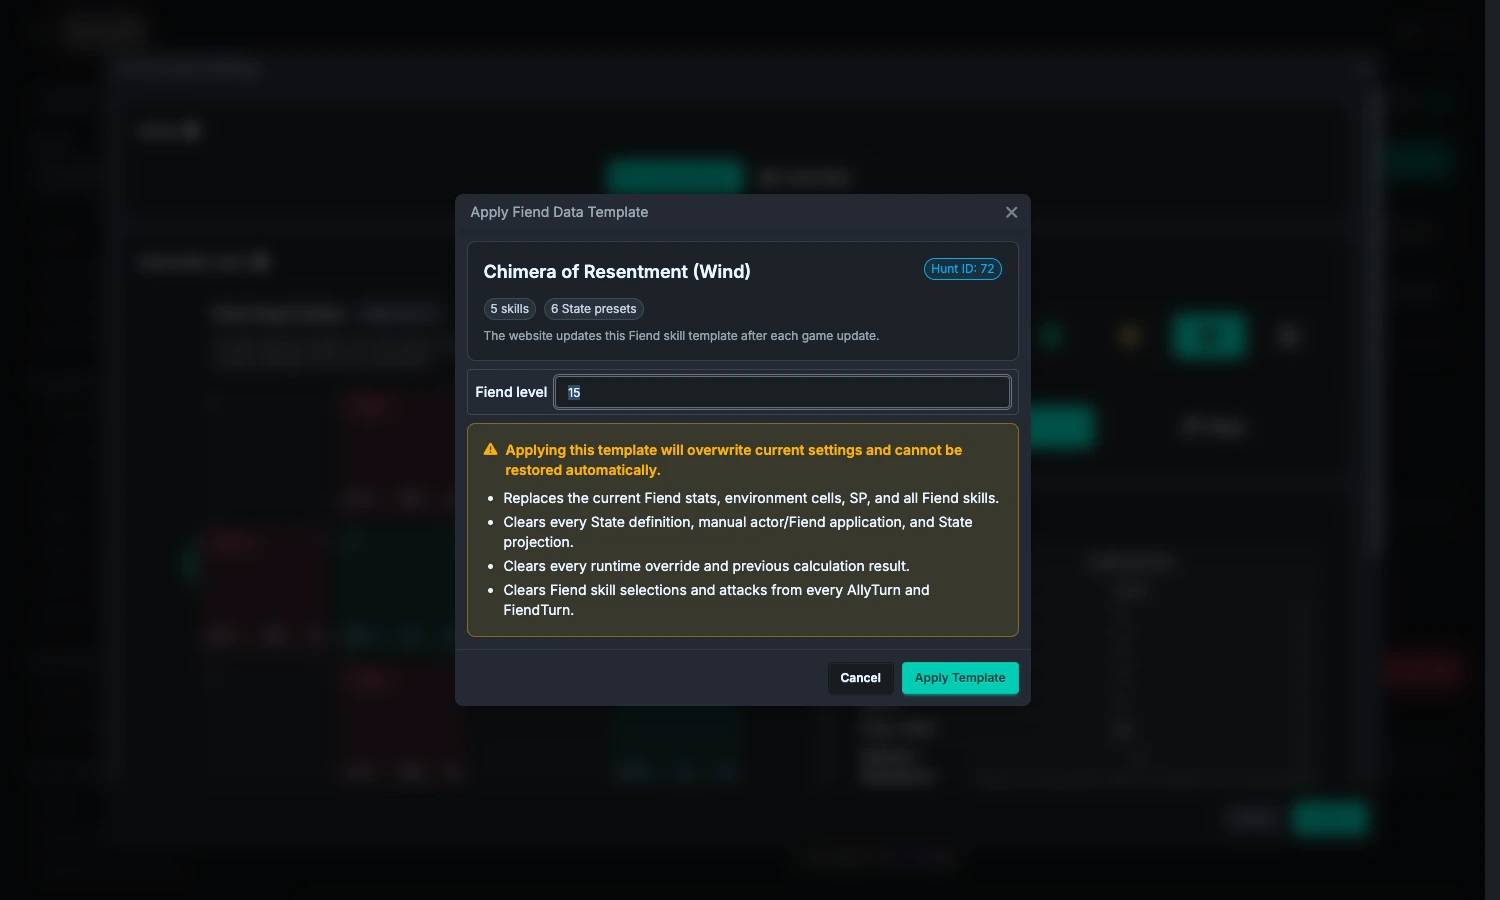
- Verify the displayed Fiend. If there are multiple choices, select the Fiend first instead of looking only at the level.
- Select the Fiend level and confirm that the name and data match this challenge. Fiend Hunt templates currently provide levels 1–25; for Guild Raid, use the applicable data actually offered by the interface and do not treat unverified candidate data as an available level.
- Read the warning, then click "Apply Template". Canceling the template window does not import anything; after applying, the outer Environment Settings Cancel button cannot restore the previous data.
The template replaces or clears:
- Fiend stats, attribute, mode, environment cells, weak points, head position, SP, and all Fiend skills.
- Existing state Presets, replacing them with the Presets provided by the template; manually applied character and Fiend states are also cleared.
- Existing Fiend skill selections and attacks in each Round, manual battle-state overrides, and states / fields produced by the old settings.
- Previous calculation results.
The template keeps: teams, character settings and gear, ally actions, and the number and order of Rounds. This differs from importing a normal formation template: an official Fiend template does not replace your ally timeline with someone else's.
After applying, check the Fiend stats and parts, character positions, and each Fiend Turn skill in order, then calculate again. If automatic skill selection was already enabled, it reschedules against the new template; if it was not enabled, select a skill in each Round or enable automatic skill selection separately.
2. Attackable Parts, Weak Points, and Head
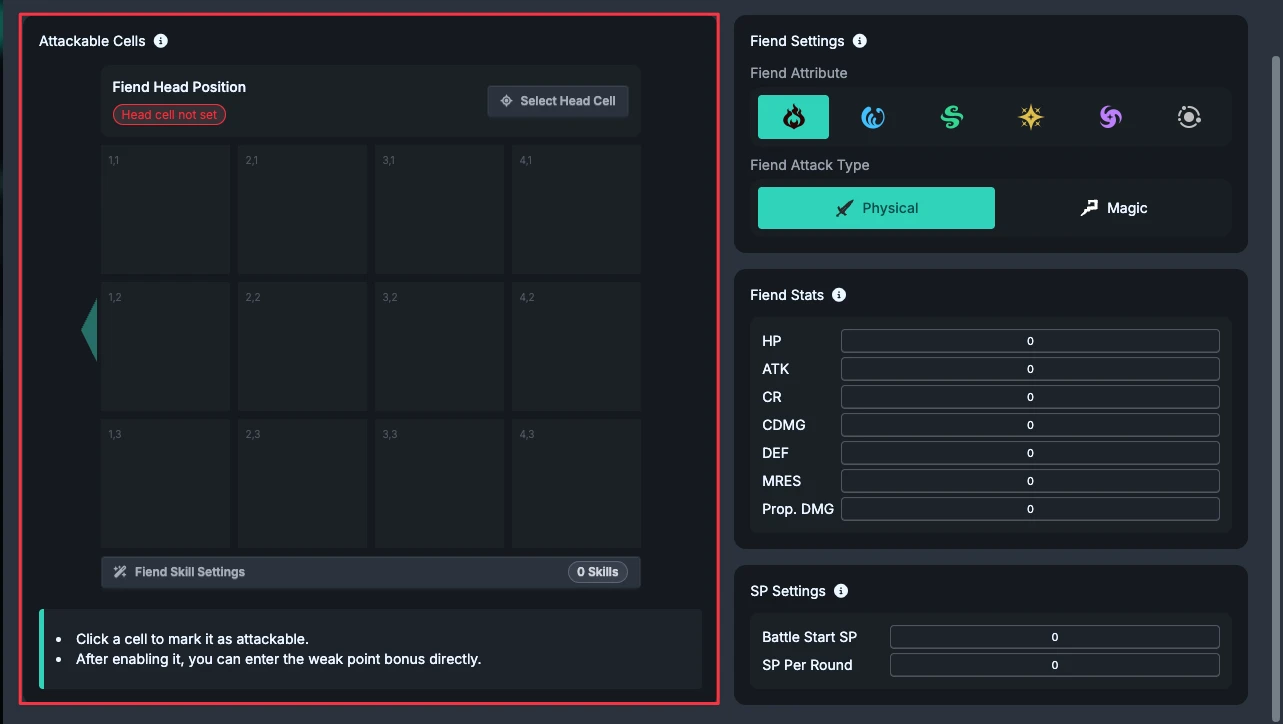
- Click cells to mark the Fiend parts that allies can attack. Mark at least one cell.
- Enter the weak point bonus for each attackable cell.
- Use "Fiend Head Position" to designate one attackable part.
The default target for character counterattacks is the Fiend head, not the attack source cell of a Fiend skill. If the head is unset or invalid, the counterattack target may not resolve; always confirm it when using a counterattack character.
These are the Fiend parts allies can attack, not the areas where the Fiend can attack allies. After changing parts, also recheck Fiend skill source cells, custom Fiend ranges, and counterattack targets.
3. Attribute, Stats, Immunities, and SP
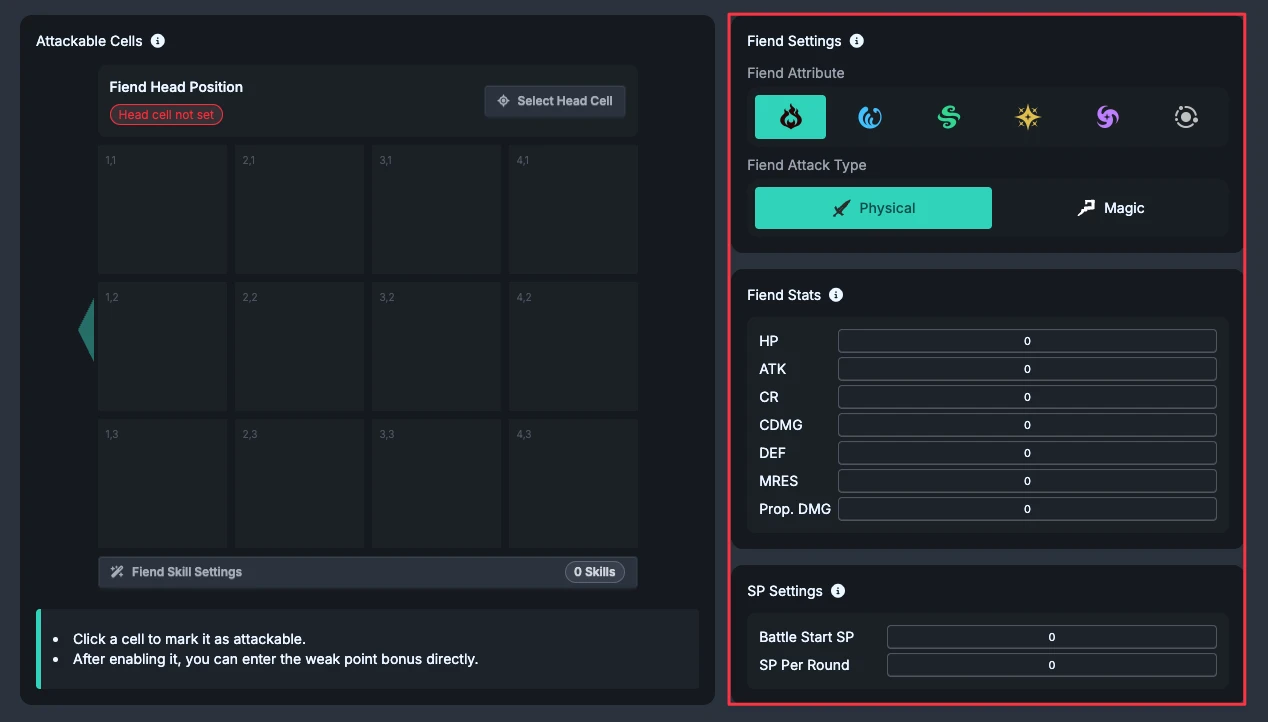
Fiend data affects damage and incoming-damage checks. Confirm each item before a formal calculation:
- Attribute and attack type: for example, Wind attribute and Physical or Magic attack.
- Fiend stats: HP, ATK / MATK, Defense, and so on; do not adjust only the skill multiplier.
- Element resistance: found under "Fiend Stats"; enter a decimal from 0 to 100%. It applies to resisted Fire, Water, and Wind hits. Light and Dark do not use this setting. It is not the bonus on an attackable weak point.
- SP: battle starting SP and the amount recovered each Round. You can later trace spending and carryover in each Round's SP details.
Fiend Immunities
Click "Edit" under "Fiend Immunities" and select the immunities that match the game situation, such as Knockback, Silence, Weakening, Damage over Time, Concentrated Fire, Buff / Debuff Removal, and Barrier.
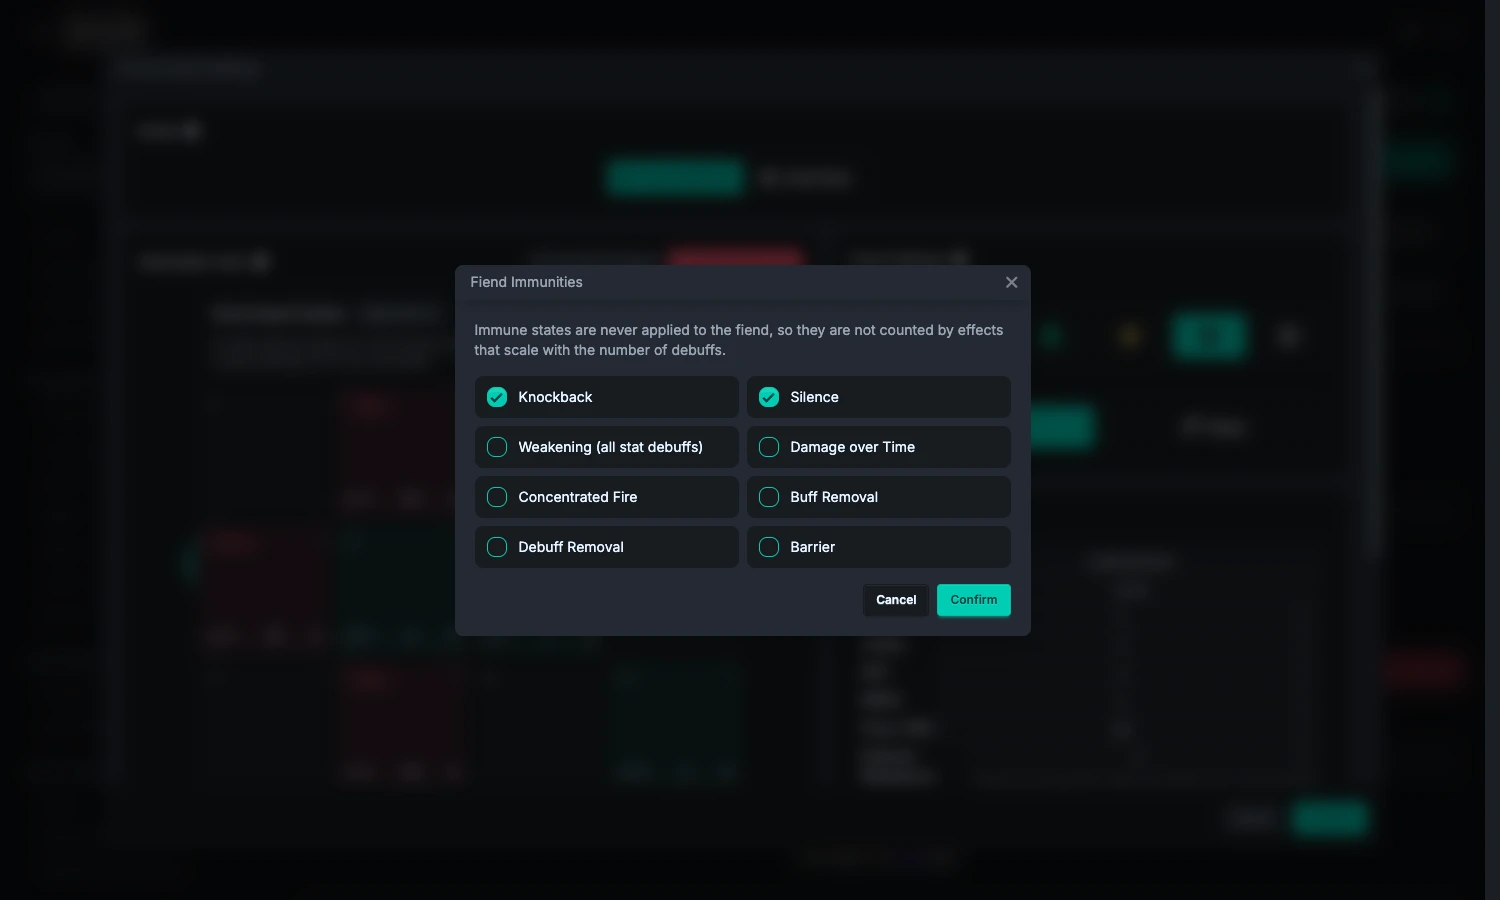
Do not count immune states just to increase the number of Debuffs. Immunities affect whether states can be applied or removed; they are not merely visual labels. After clicking "Confirm" in this child window, click "Confirm" in the Environment Settings window as well to apply the change.
4. Create Teams
After configuring at least one attackable part, click "Team Settings".
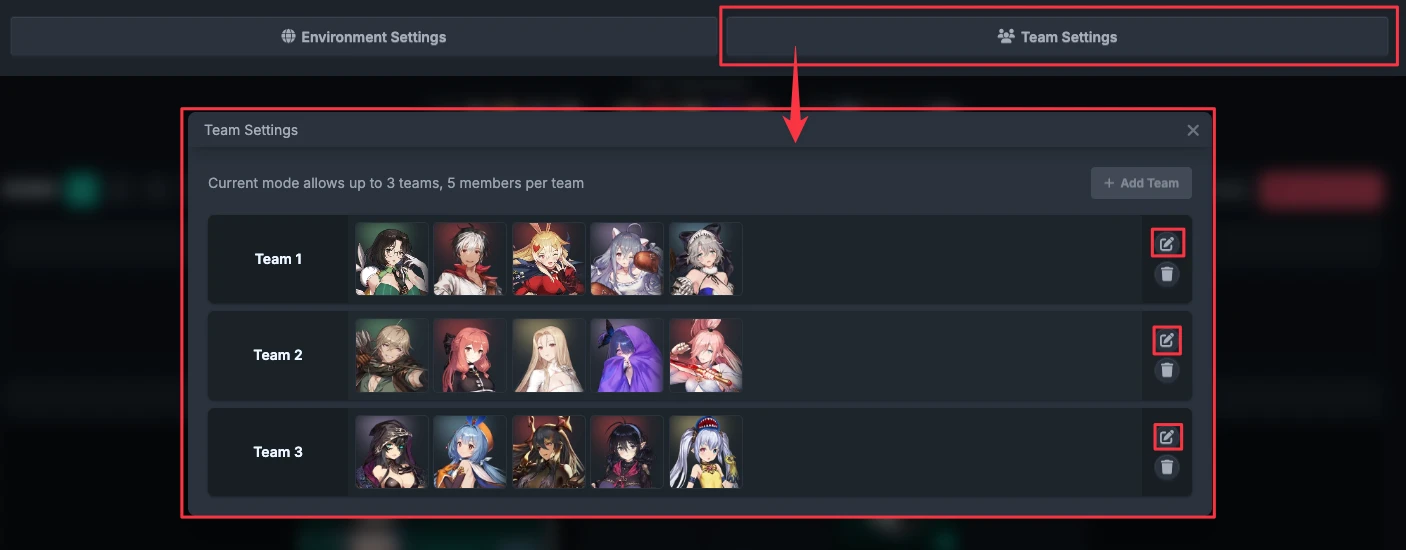
Add a team and characters, then click an avatar to open character settings. A character cannot be placed in different teams; to move one, remove it from the original team first. Demo teams can be inspected, but their fixed members and configuration cannot be edited.
5. Confirm the Costume Data Source First
"Costume Collection Settings" on the main page determines which ownership records, enhancement levels, skill potentials, and burst unlocks FRC uses. It is separate from the character's custom final-stat panel.
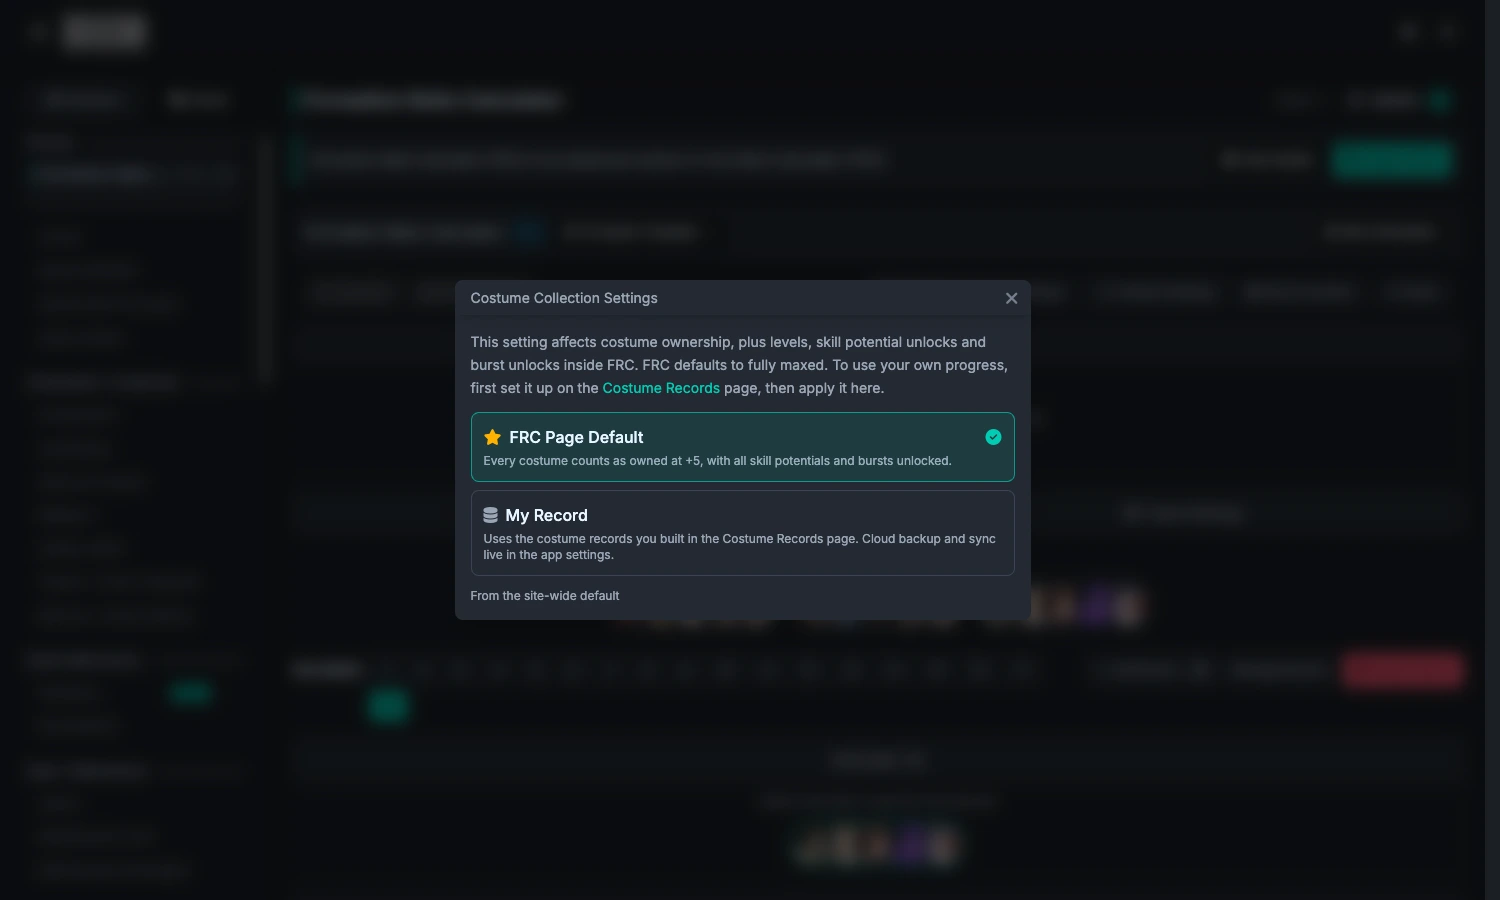
- FRC Page Default: every costume counts as owned and +5, with all skill potentials and bursts unlocked. This is suitable for comparing an ideal setup.
- My Record: uses local costume records. First organize your progress on the Costume Records page, then apply it here.
On the first use, the source is resolved from the site settings; an existing session record takes priority. Switching it inside the tool affects only the current visit. To make it the FRC default, use "Make this the page default". Cloud backup / sync is handled in app settings; it is not a third source here.
6. Character Settings and Final Stats
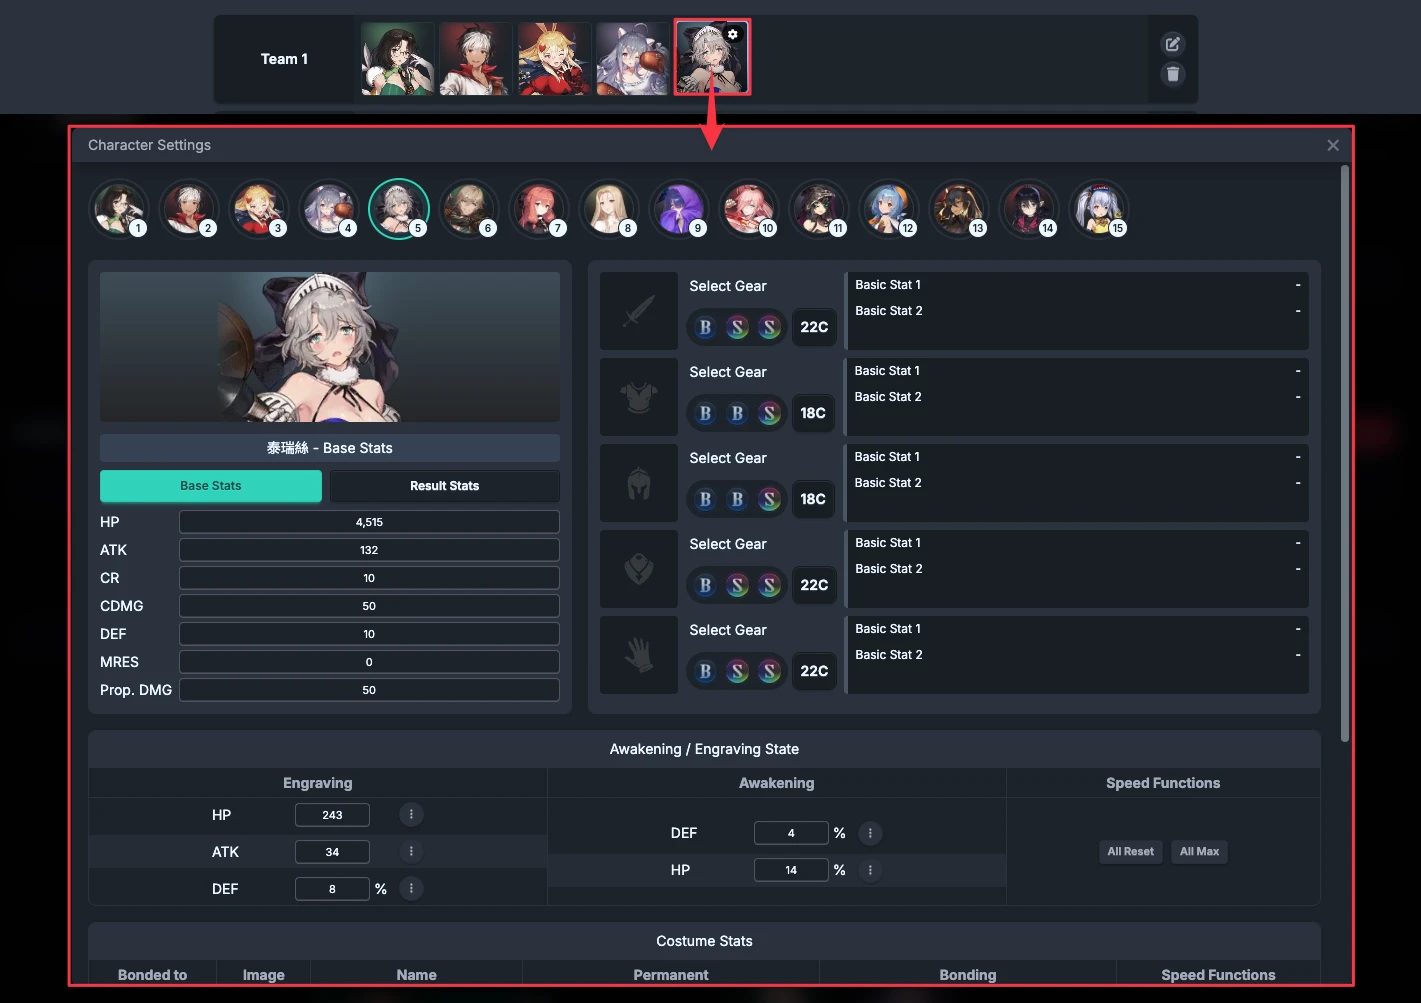
For each character, confirm gear, costumes, and detailed settings. To use your actual panel, enable "Use Custom Final Stats" and enter the values manually or apply them from the Character Stat Calculator.
Next, continue to Rounds and Actions. Decide gear setup and each character's optimization target later in Calculation Settings and Results.